14 Incident Reporting
Allow workers, visitors and admins to Report worksite Incidents via smart phones, tablets and other devices.
To learn more about Incident Reports click here.
Incident Reporting Portal can be activated for each Site. When your URL is visited your workers will be prompted to provide their details first.
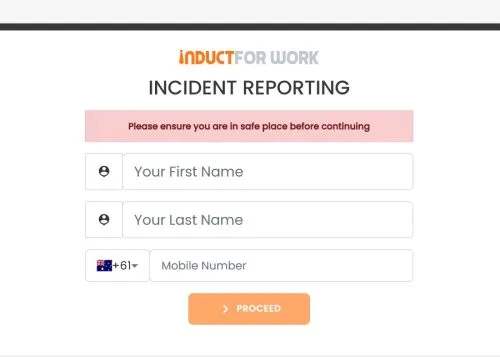
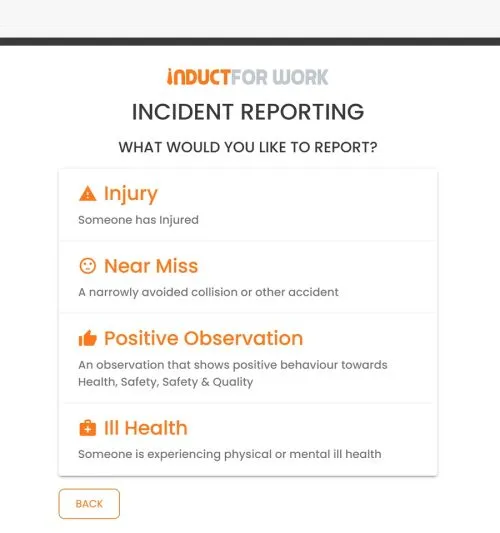
Then select the incident type they are reporting: ‘Injury’, ‘Near Miss’, ‘Positive Observation’ or ‘Ill Health’.
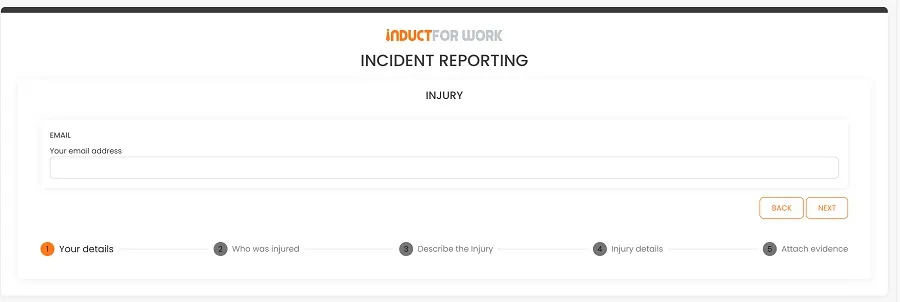
After a series of Questions are answered and photographic evidence is provided (if any) your admins receive a notification that an Incident has been logged and a direct link to it is provided.
When you click on it it would take straight to your Incidents.

Each incident report is logged using a uniquie ID, date and time as well as the details of the person involved. To view all the data about the incident simply click on the Incident Report ID.
Setting up Incident Reporting
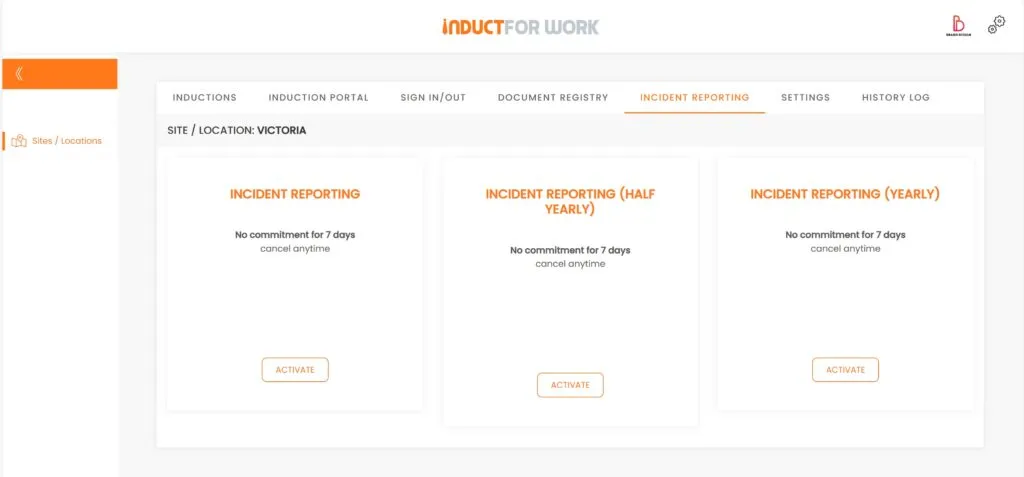
To activate this function you need to click on ‘Sites/Locations’ and then ‘Incident Reporting’.
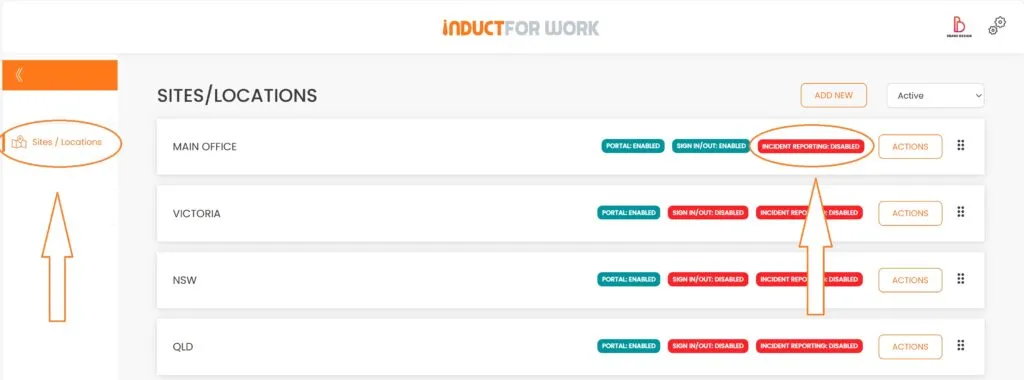
Now select Monthly, Six Monthly or Annual Billing. Current pricing will also be displayed. If you have never activated ‘Incident Reporting’ in the past you will be offered a free trial for 7 days.
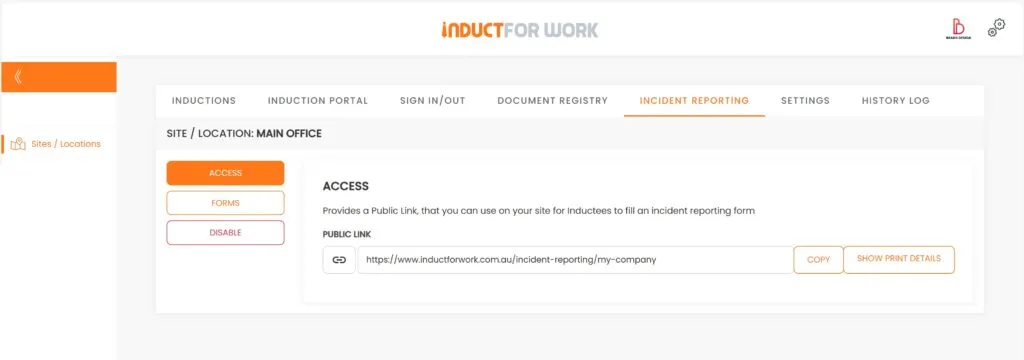
Each Incident Report Portal comes with its own URL.
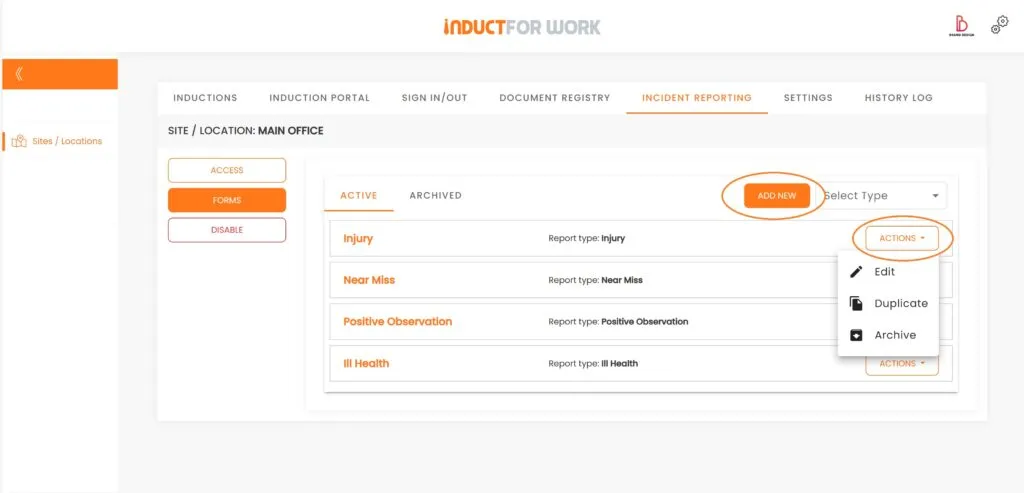
There are 4 preloaded Forms you can edit and modify. You can also add a new Form, (ie. Asbestos Found) based on your requirements.
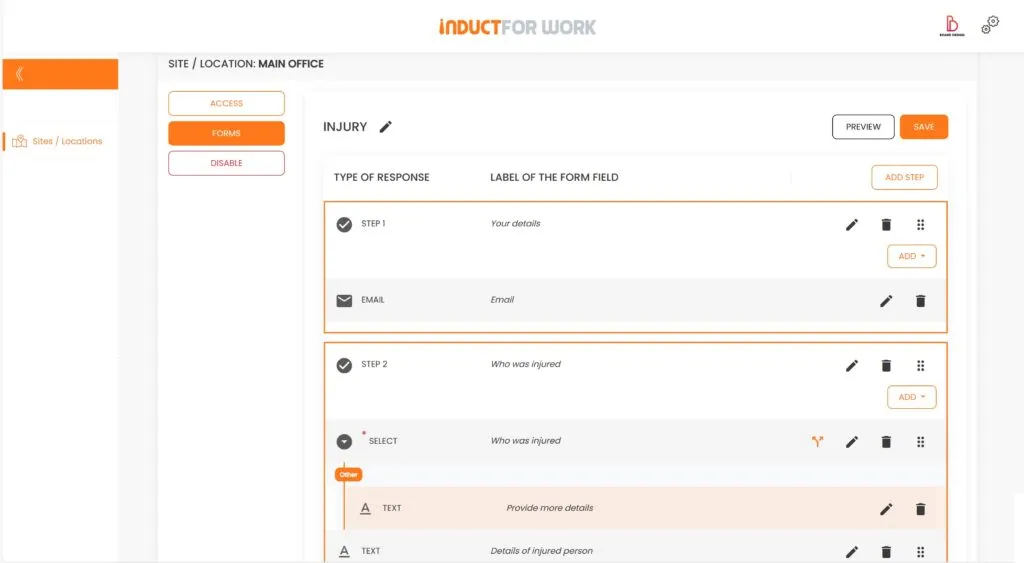
You can edit each Form to add or remove steps and questions.
But if you are time poor and need your Incident Reporting to be up and running within hours, please contact us for a quote.
This brings us to the end of session #14 on Incident Reporting. We hope that now you feel confident creating your own Incident Forms. If you need any help – please get in touch with us and we will happily take you through any obstacle.
In the next Session we are going to cover ‘Sign In Portals’.

Can’t find the answers you are looking for? – Contact us