15 Sign In Out
Before we go into how to activate and setup ‘Sign in Out’ function let’s quikly go over how ‘Sign in’ works.
Electronic “sign-ins” work by capturing and recording an individual’s identity and presence using Induct For Work.
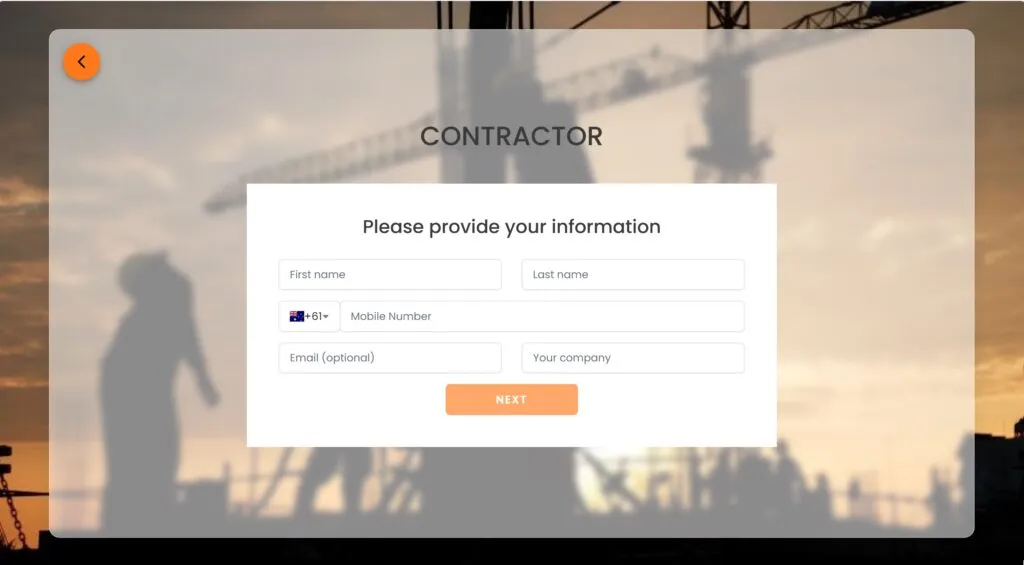
Identification: The first step is to identify the individual who needs to sign in. This could involve entering a username, employee ID, or using a biometric identifier such as fingerprint, facial recognition, or iris scan.
Verification: Once the individual’s identity is provided, the system verifies it against a stored database of authorized users. This could involve checking credentials such as passwords, PINs, or biometric templates.
Logging: After the individual’s identity is verified, the system logs the sign-in event along with relevant details such as the date, time, and location. This information may be stored locally on the device or transmitted to a central server for record-keeping and analysis.
Access Control: In some cases, electronic sign-ins may also be tied to access control systems, where successful sign-in grants the individual access to certain resources, areas, or functionalities within a system or facility.
Reporting and Analysis: The data collected from electronic sign-ins can be used for various purposes such as attendance tracking, compliance reporting, security monitoring, and performance analysis.
Activating 'Sign In Out'
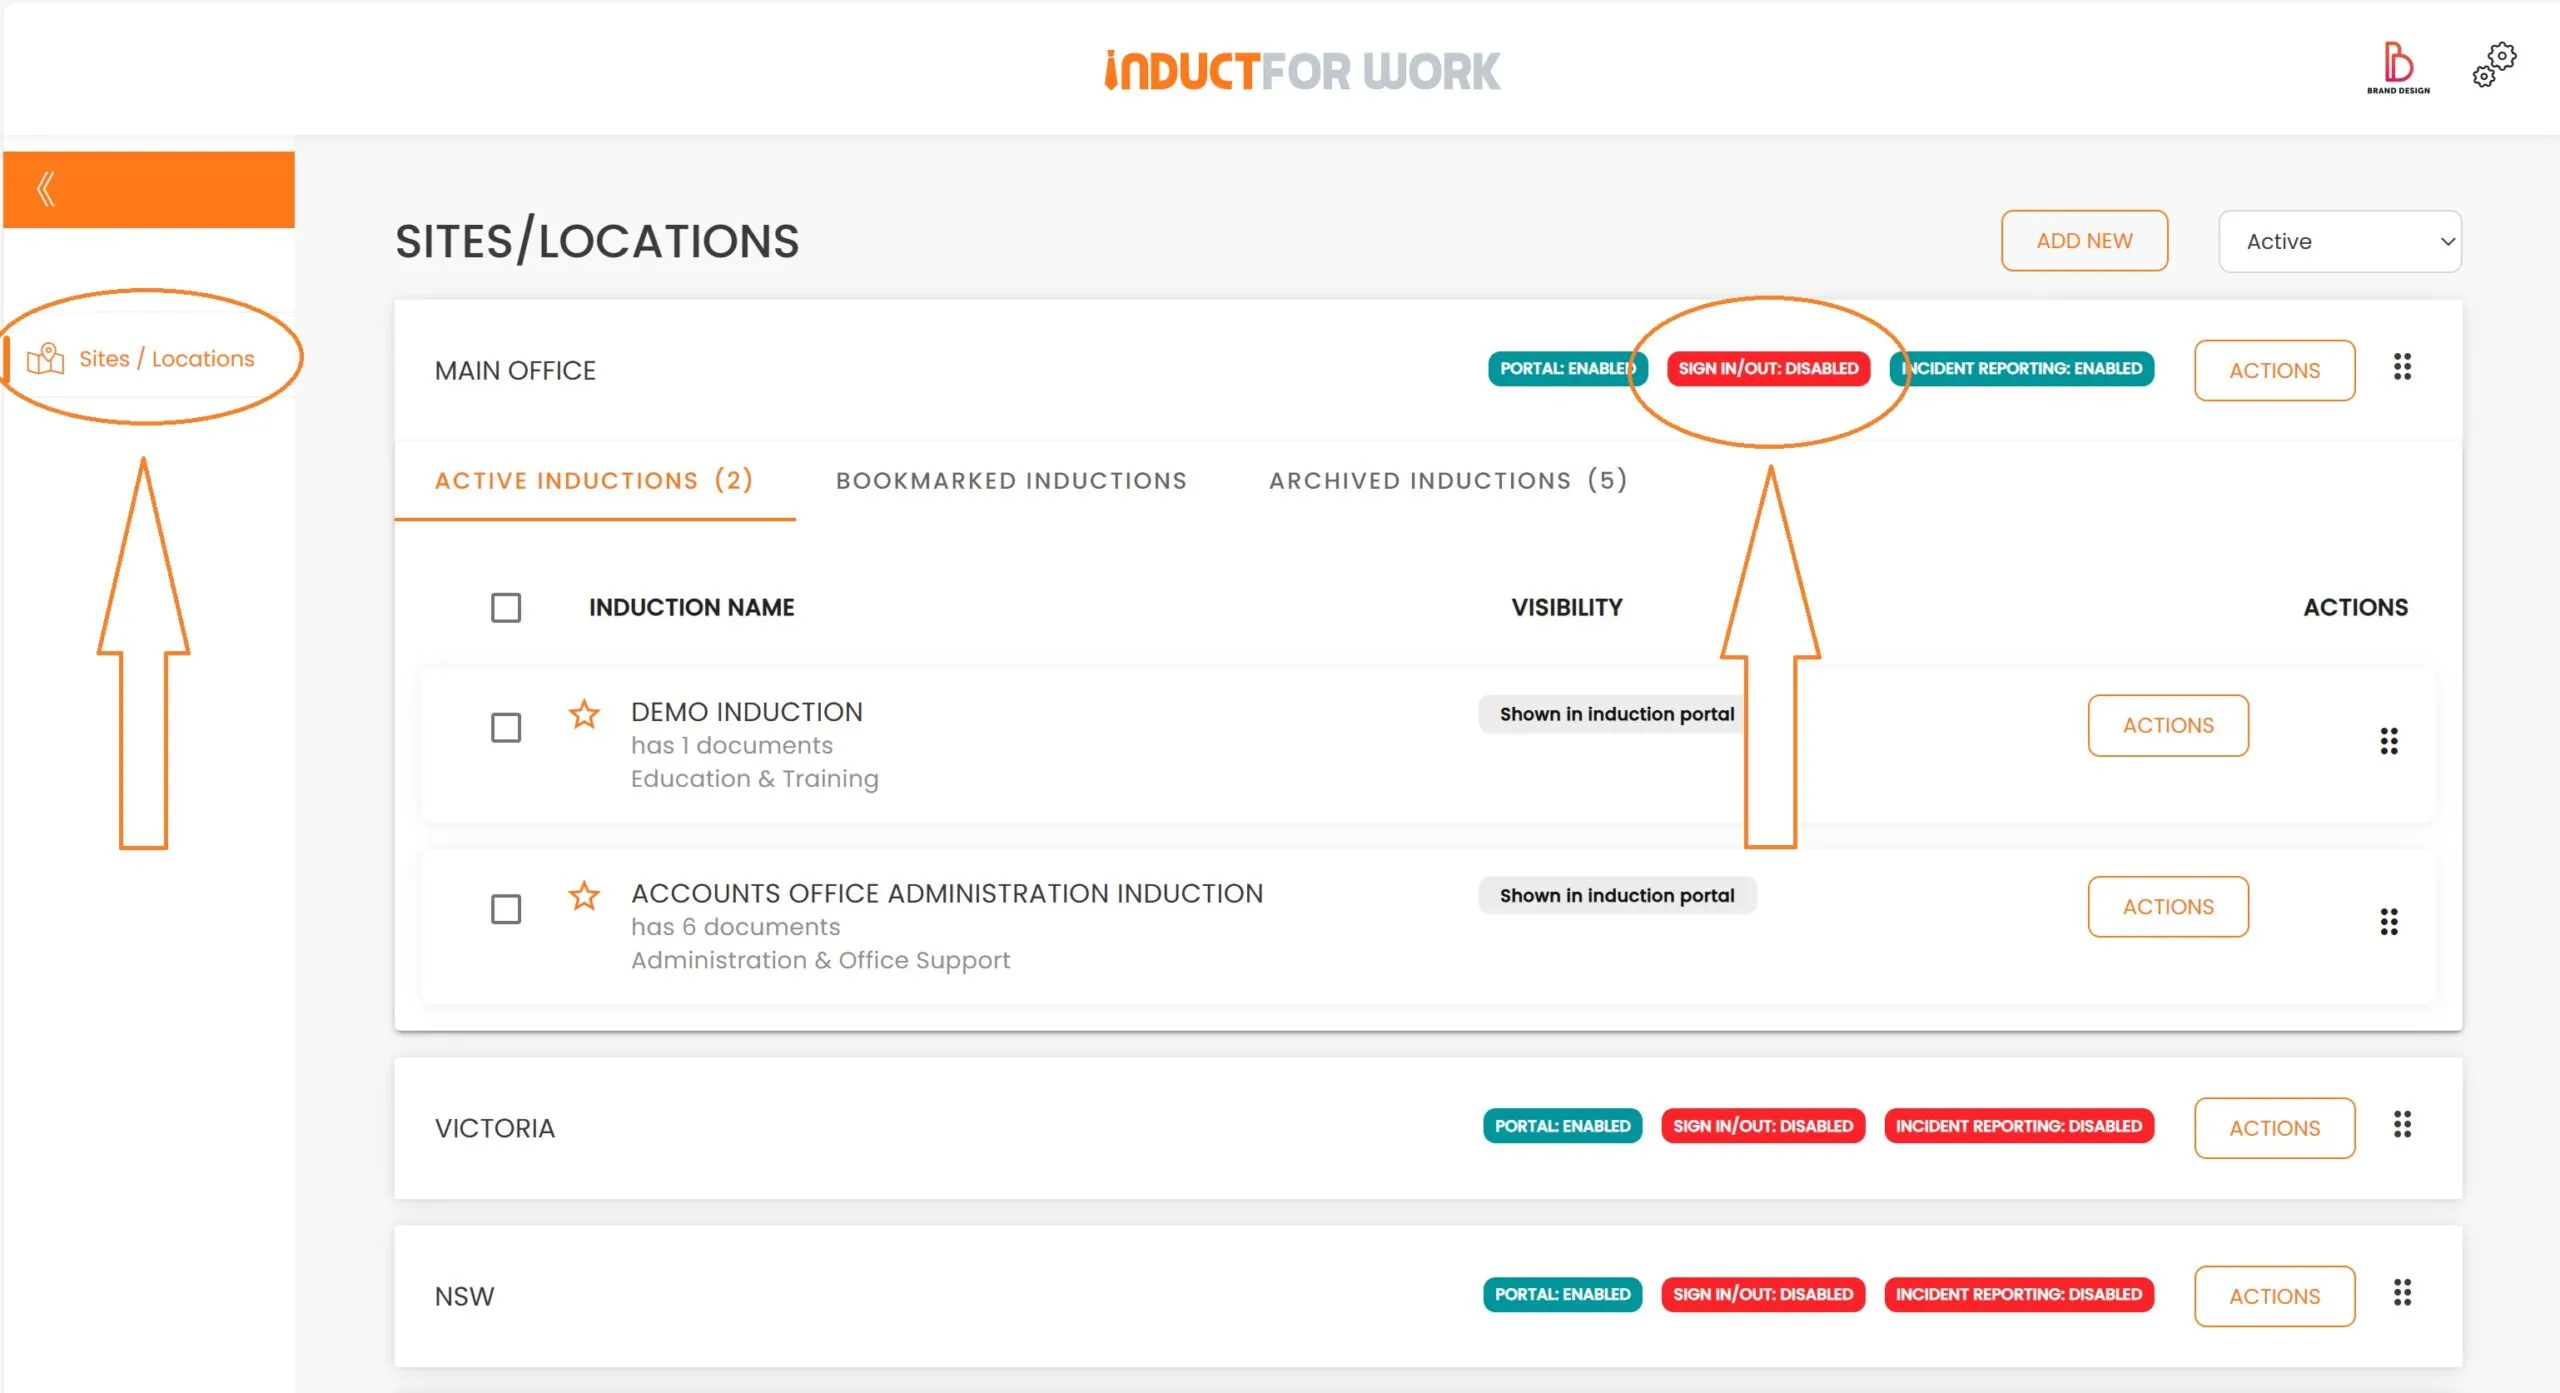
Go to your ‘Sites / Locations’ and click on ‘Sign In / Out’.
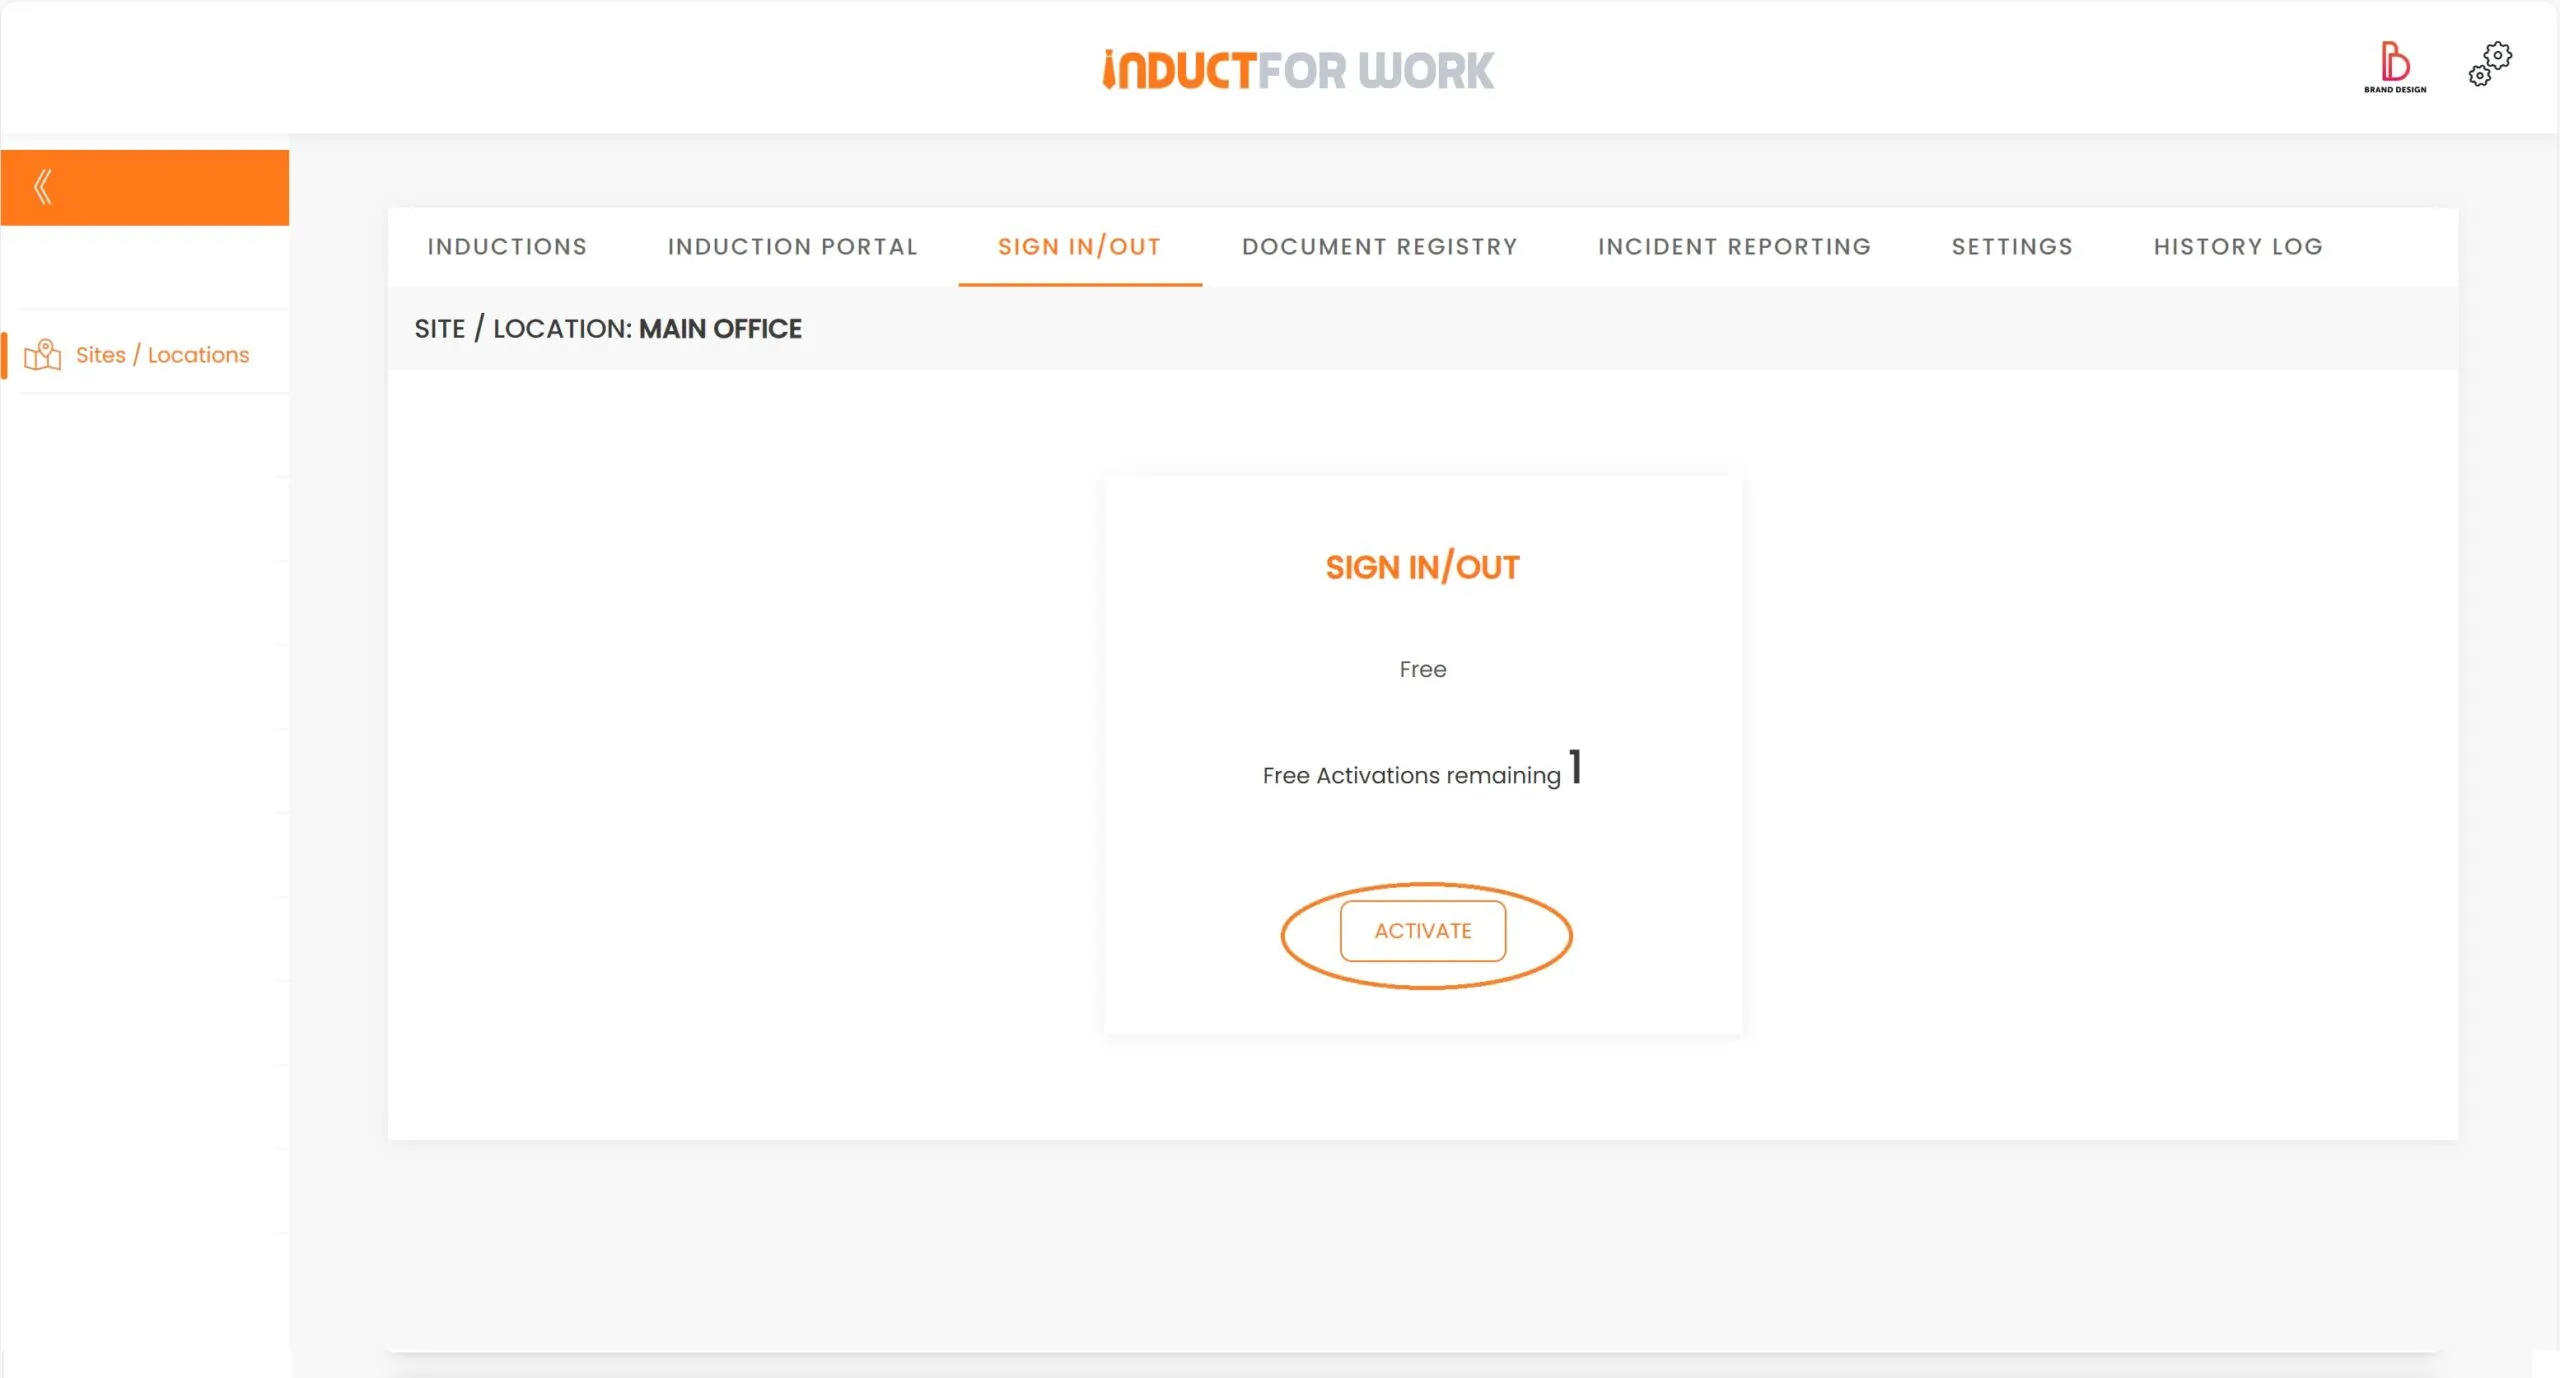
You will notice that ‘Sign in’ function is Free of charge. Most paid subscriptions include 1 Free ‘Sign In’ Portal at no cost. To activate it click ‘Activate’.
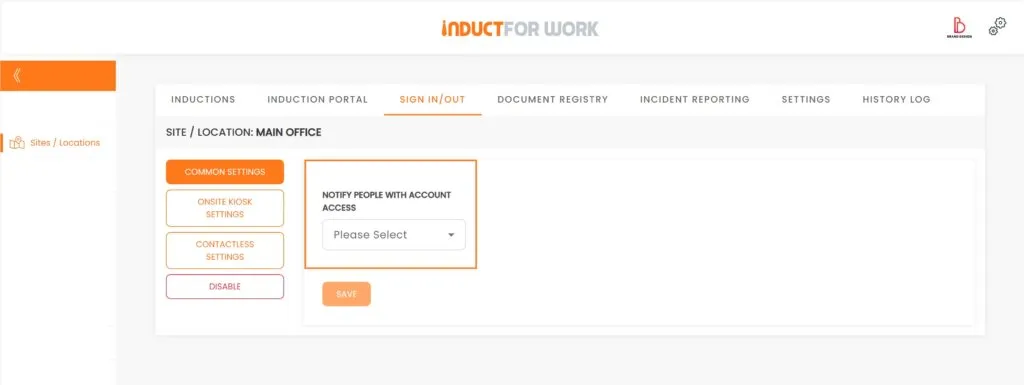
Once activated you can choose who should be receiving Notifications when your workers sign in and out.
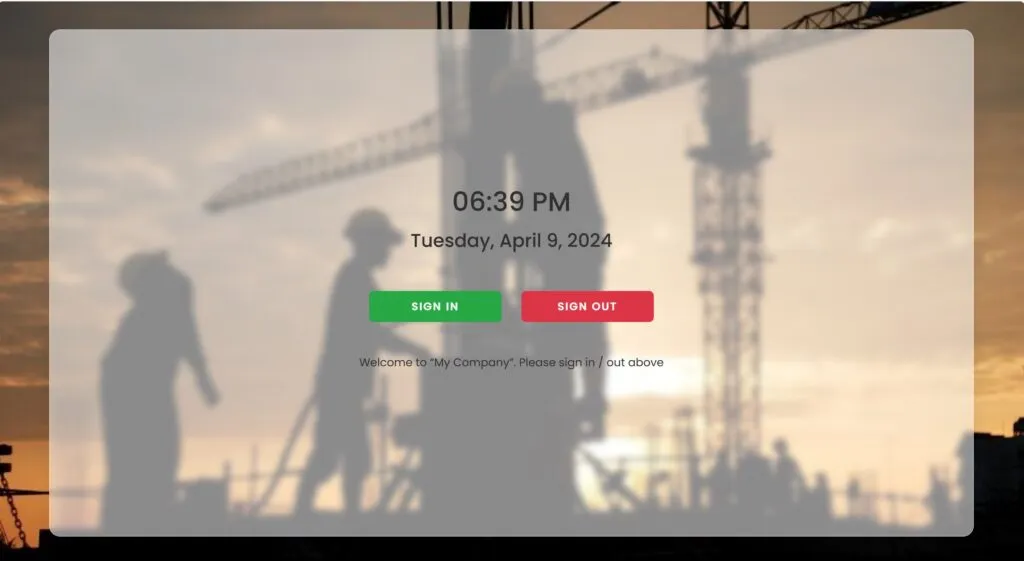
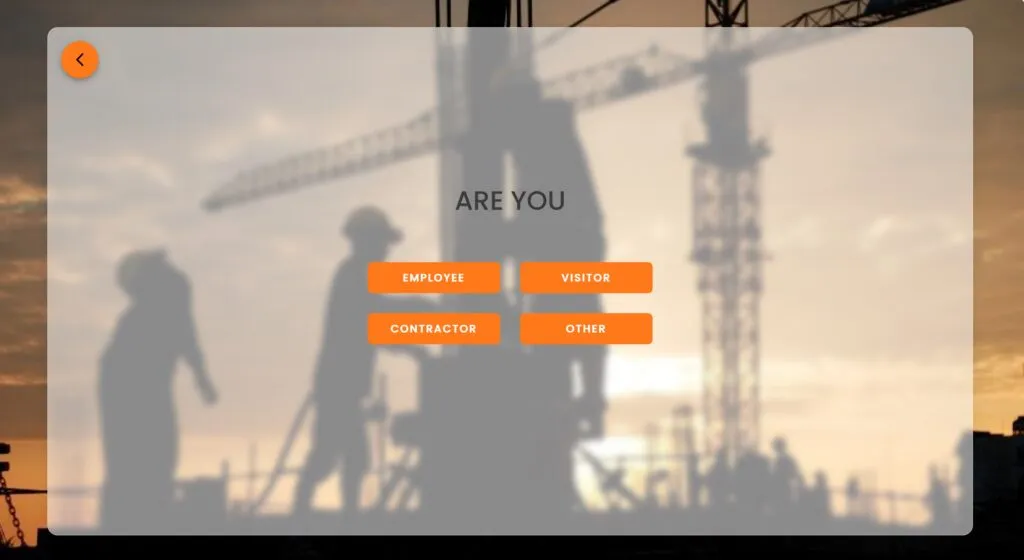
Next up is ‘Onsite Kiosk Settings’ and ‘Contactless Settings’. These are your Sign in Portals.
Please Note that the background image can be changed to your own image from ‘Induction Portal Advanced Settings’ area.

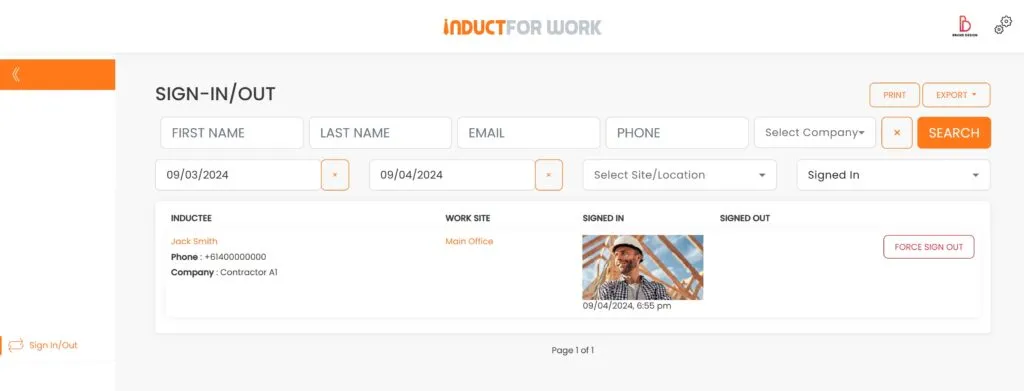
Now let’s have a look at how admins see their Admin Sign dashboard. You can filter all your sign in entries by user details as well as by dates and Site Locations.
This brings us to the end of session #15 on Sign In Out. We hope that now you feel confident activating your own Sign In Out. If you need any help – please get in touch with us and we will happily take you through any obstacle.
In the next Session we are going to cover the ‘Broadcast’ function.

Can’t find the answers you are looking for? – Contact us