8 Induction Portals
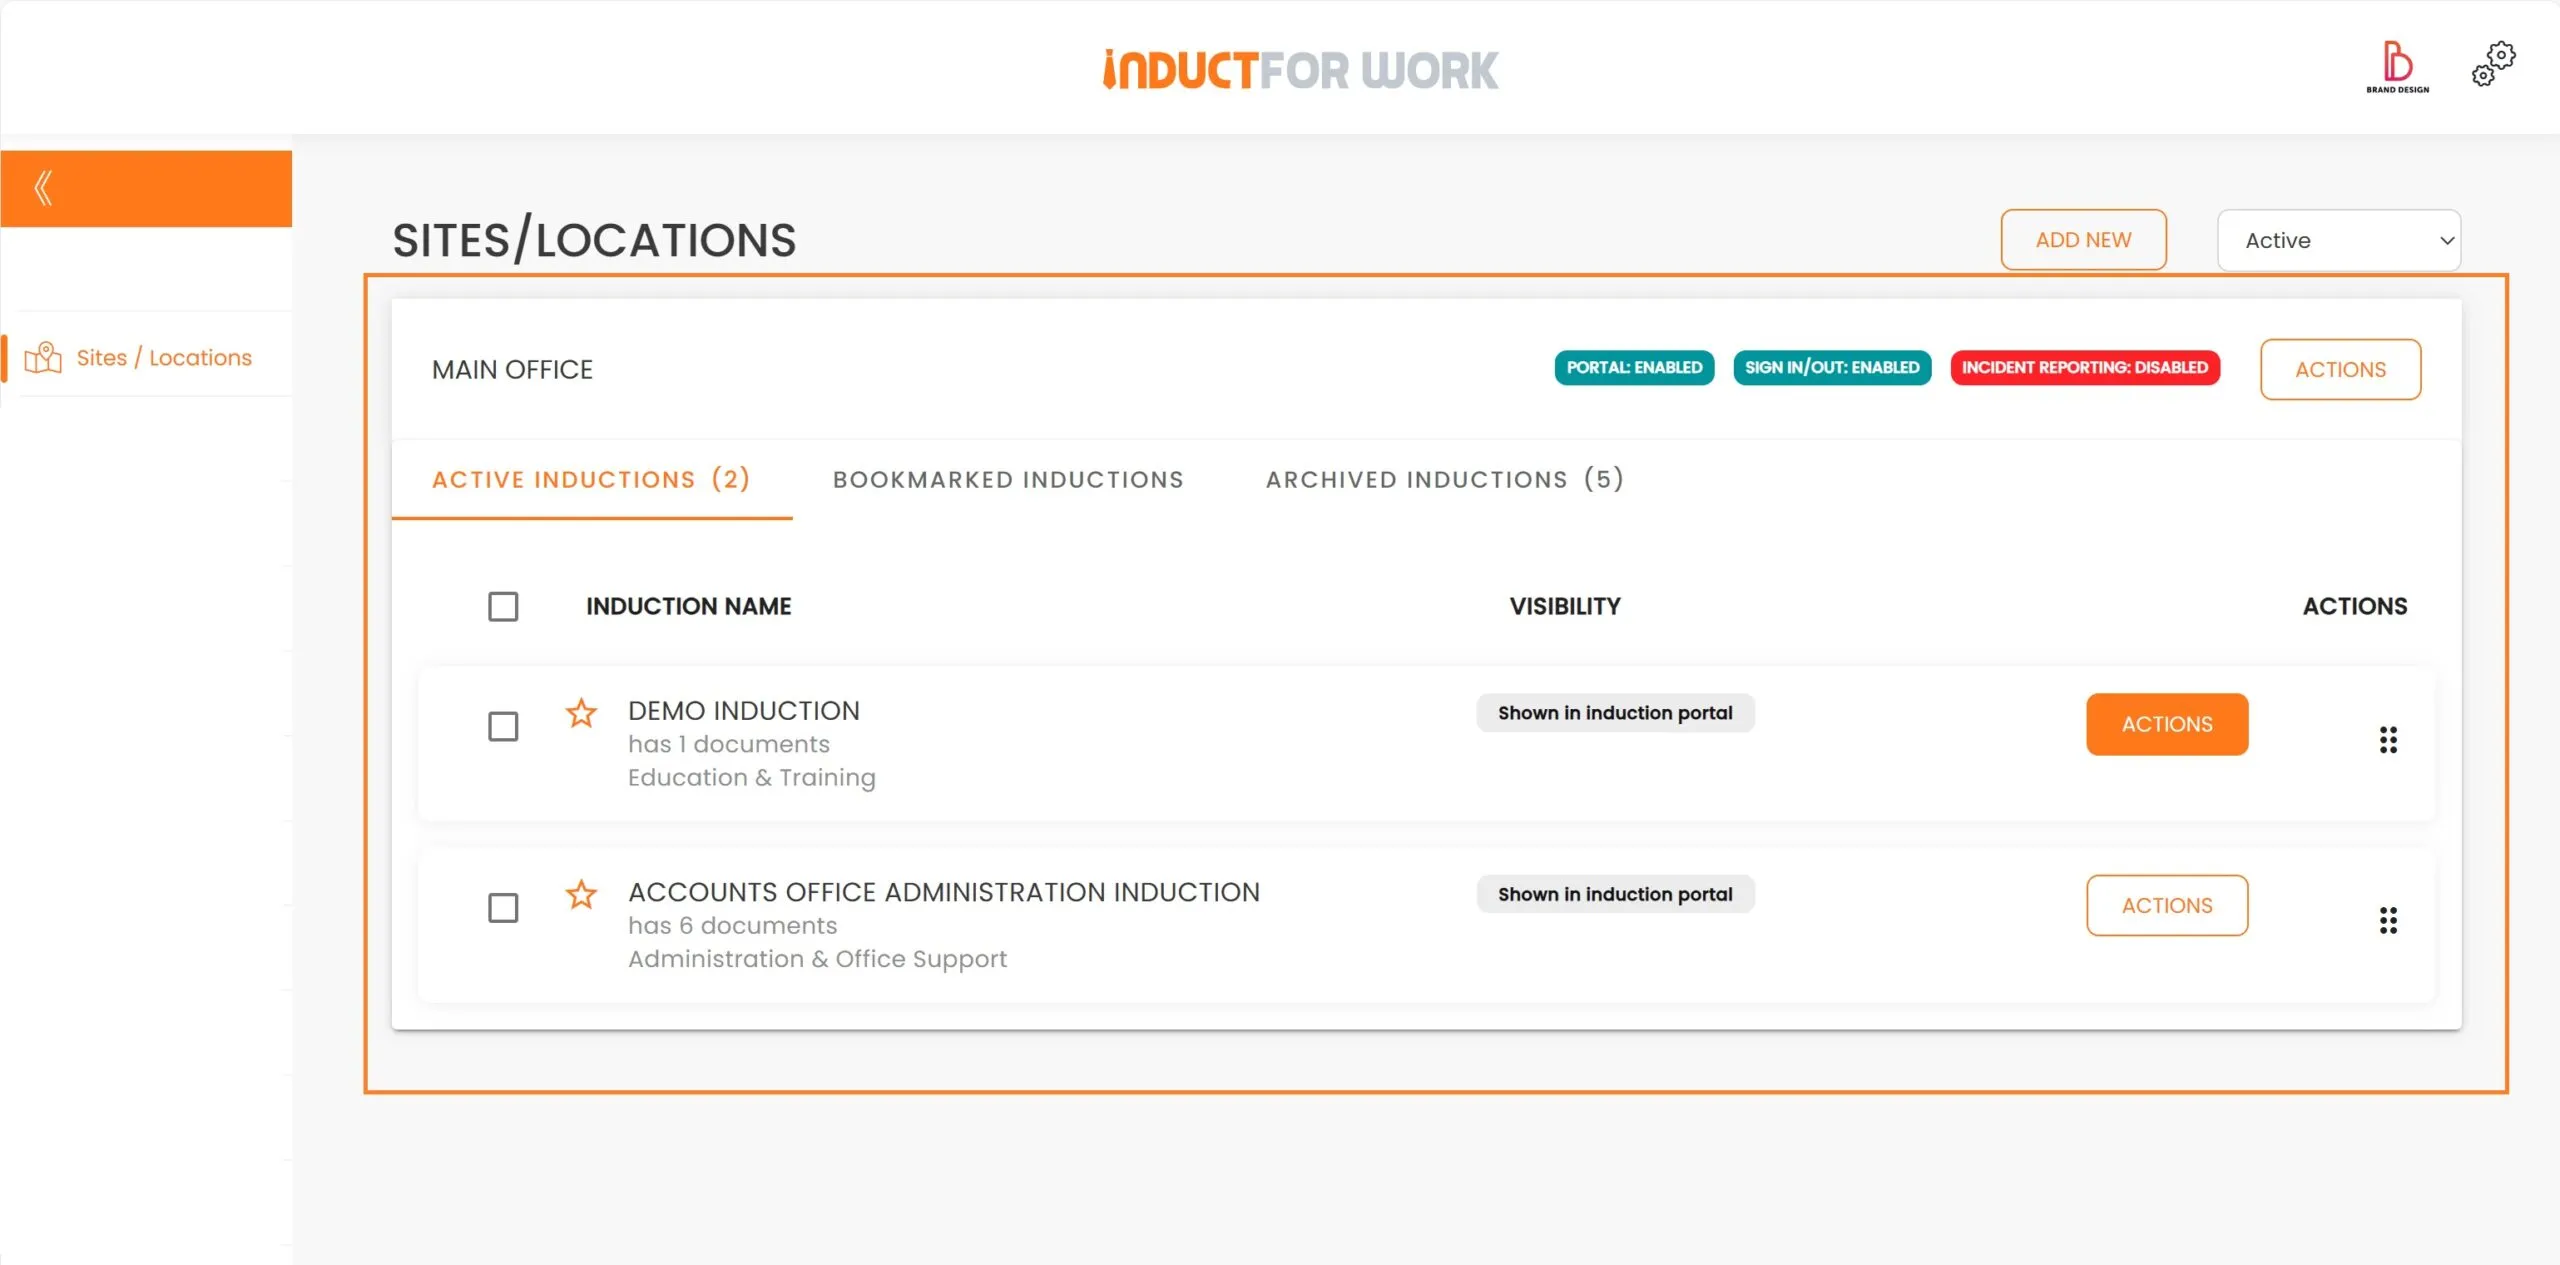
A Portal is an area of your online account where you store your Inductions. Each Portal has its own URL and is protected by a password to prevent unathorised access.
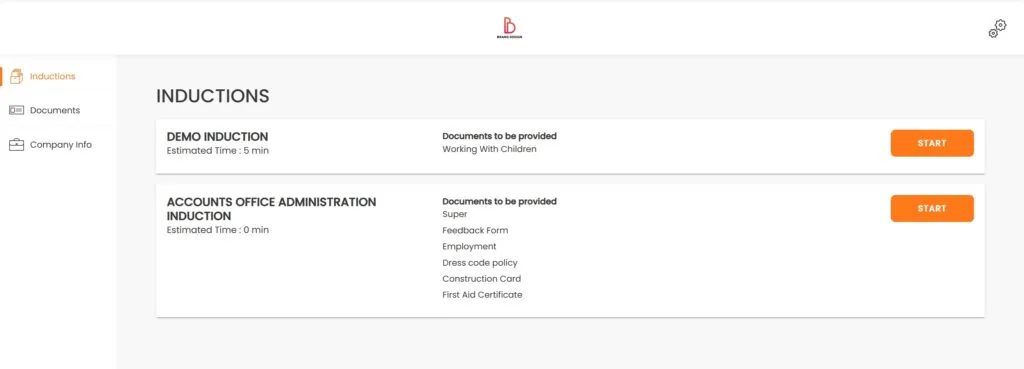
When your users visit your Portal they can access and particiapate in your Induction courses. Below is how a Portal appears in your admin account.
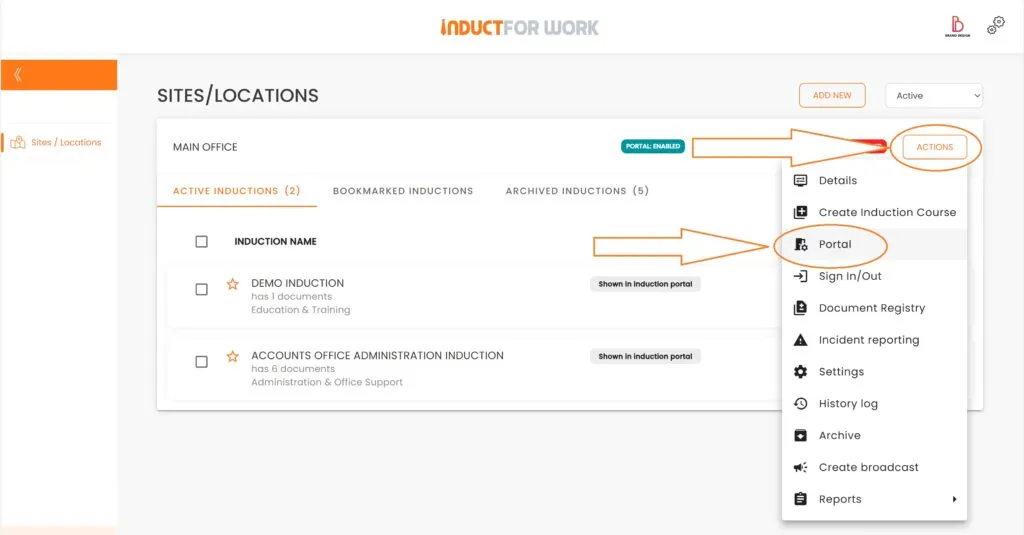
Let’s see what options are available with your Portals. Head to ‘Actions’ and click on ‘Portal’.
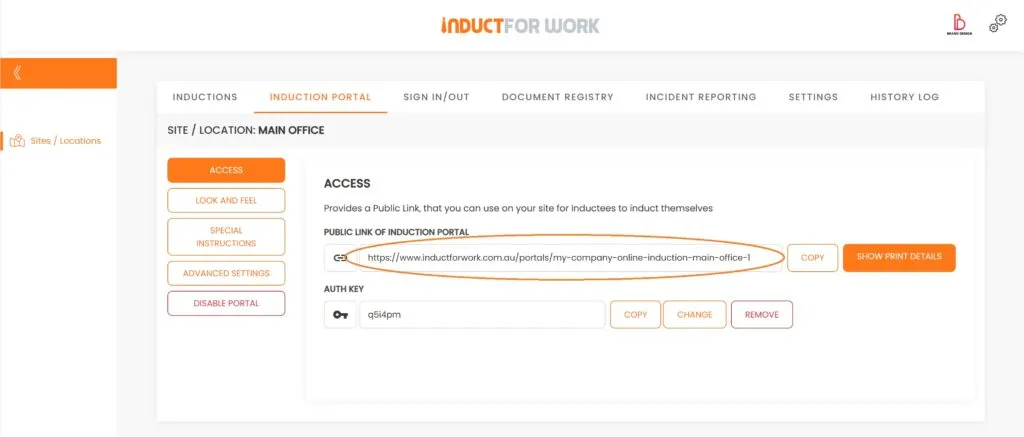
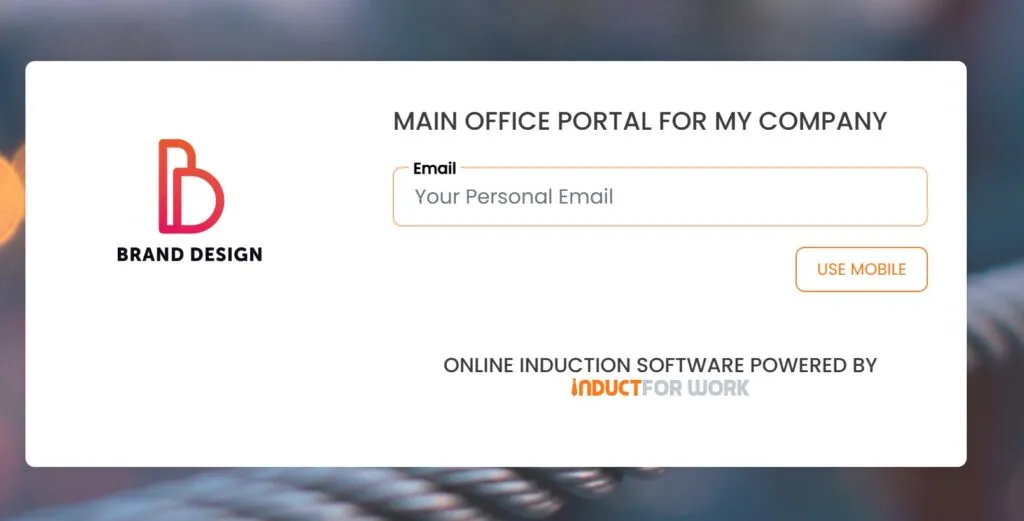
We will find all our POrtal Settings here together with our Portal URL. When we copy this URL into a different broswer this is how it appears to our users.
To users your Portal is didplayed in the format below.
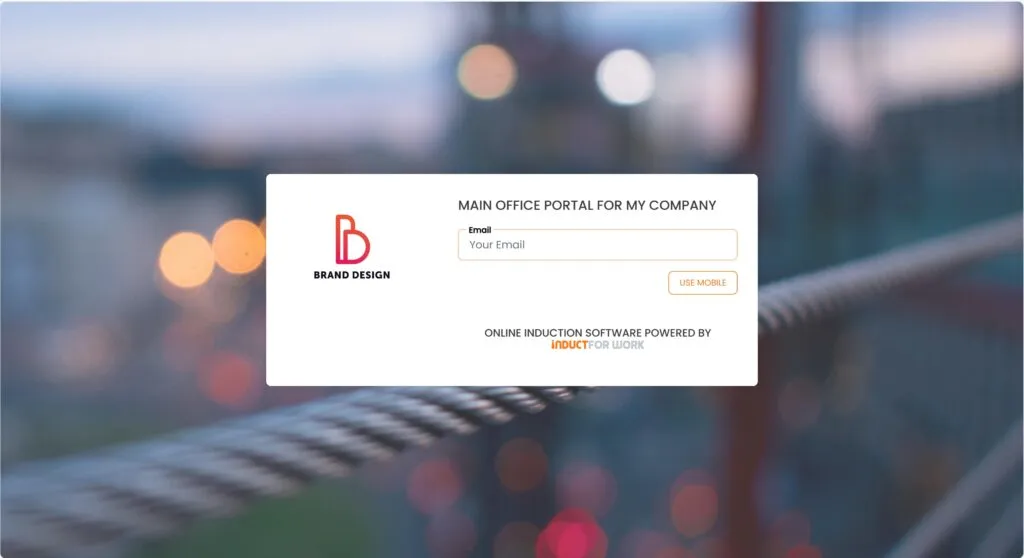
And when they login, user will see all your available (visible) Inductions.
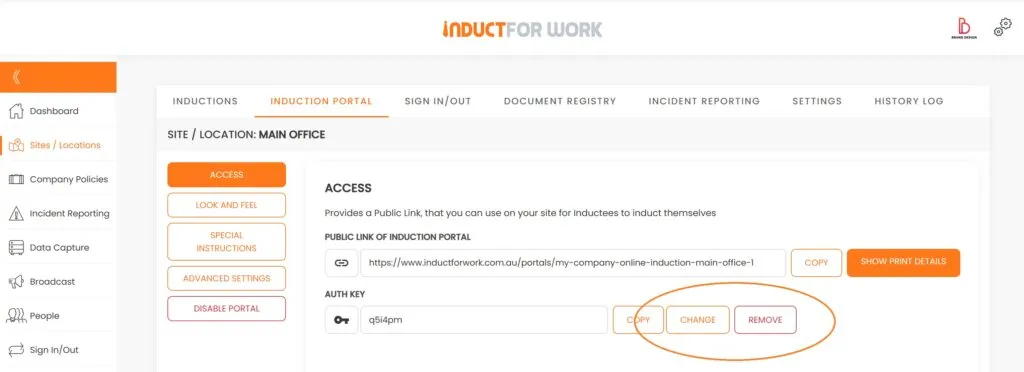
Now let’s go back to our Admin Portal and see what other options are there.
We can see that we can Change and Remove Portal auth key – password. This auth key is an additional password that all users would need to enter to be able to access their inductuions.
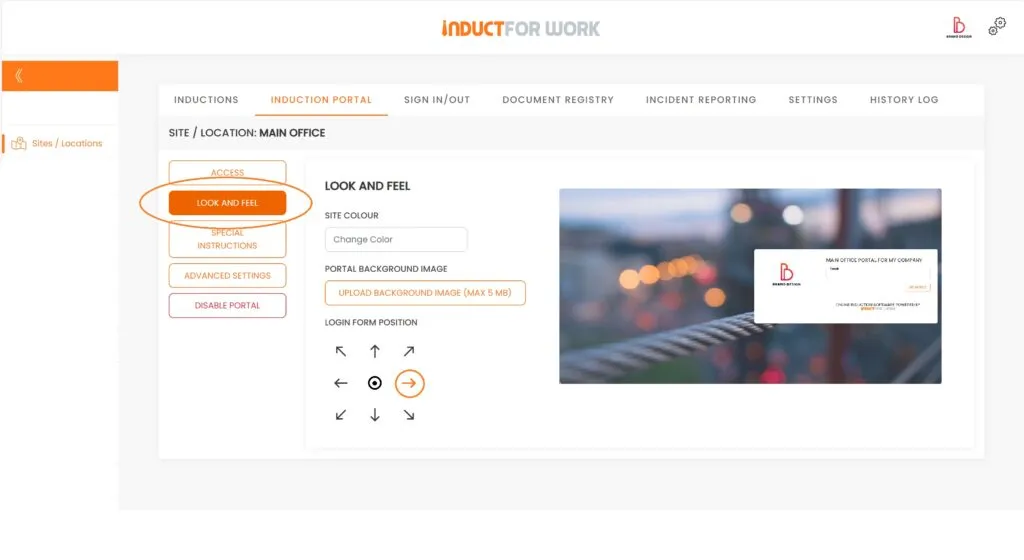
When we click on ‘ Look and Feel’ we notice that now we can change our Site Colour, Change Portal Background Image as well as Change the Login Form Position.

Once you’ve updated colours and Portal image you may consider repositioning User Login Form. If you click on Right Arrow you will notice that Login form is now positioned to our right.
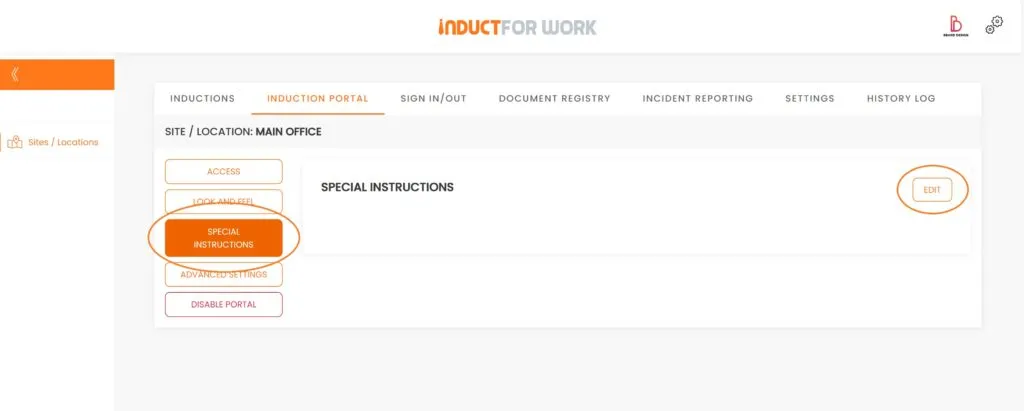
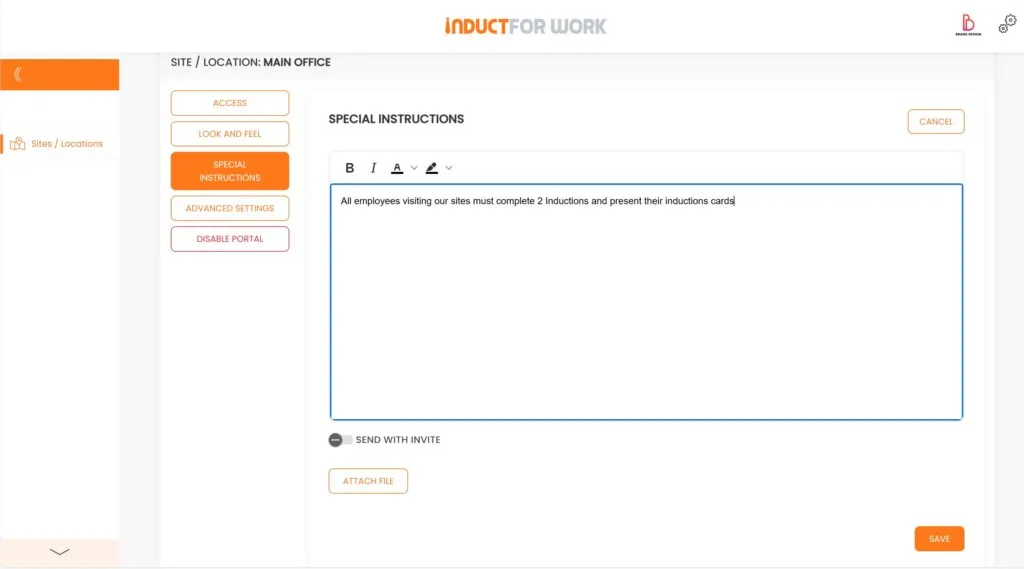
‘Special Instructions’ allows you to display any Additional Instructions to your users, when they are in Portal. Let’s see how it works. We are going to add some text by clicking ‘Edit’.
Once the text is added we click ‘Save’. If you like this text to be added to Manual Emal and SMS invites, which we will cover in our later Sessions, activate ‘Send with Invite’ too.
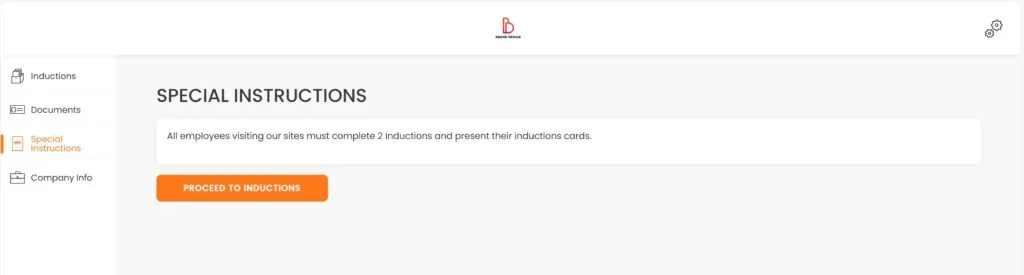
Your users would see the following:
There are some advanced Settings:
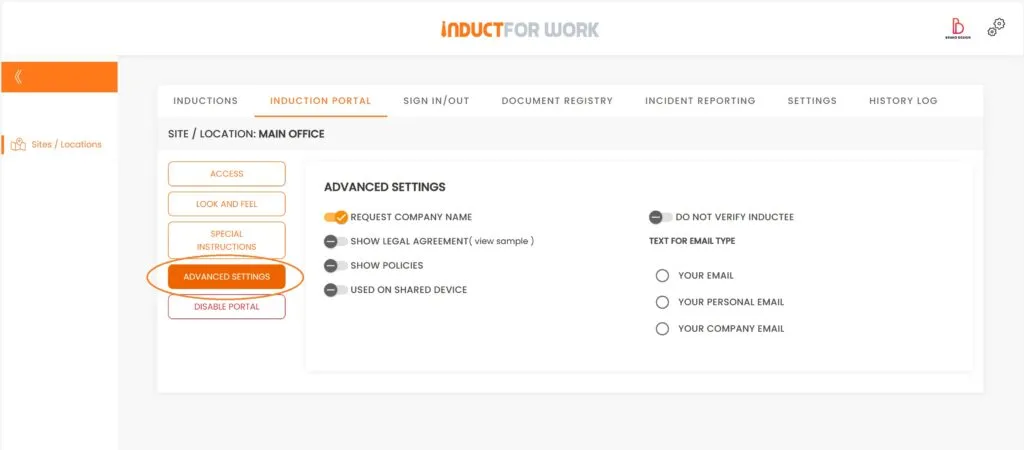
When ‘Request Company Name’ is on, your users would be prompted to enter company name they work for during their Registration on your portal.
‘Show legal agreement’ would display a woarning that falsification of documents is a crime. It is a detterent for users to complete induction courses on someone else’s behalf.
‘Show Policies’ would display your Policies to users and
‘Used on Shared Devices’ would automatically log out your users once they finish their induction, this is very useful if you use an Ipad or a Laptop as a Kiosk at your own facility, for example at your reception or in your training room. Once user is automatically logged out, the next participant can not see any data entered by a previous user.
‘Do not Verify Inductee’ removes verification process that sends out a notification to confirm user email during their registration process.
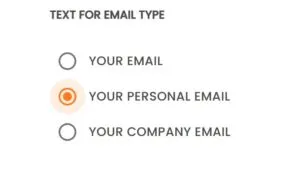
‘Text for email type’ displays selected text within Email field.
The last option to ‘Disable Portal’ would remove any user access to it, apart from admin users. Portal URL gets disabled but you can continue working on Induction Courses.
This brings us to the end of session #8 on Induction Portals. We hope that now you feel confident managing your Portal. If you still feel uncertain – please get in touch with us and we will happily take you through any obstacle.
In the next Session we will cover how to create and manage Multiple Portals.

Can’t find the answers you are looking for? – Contact us