
9 Multiple Portals
What are sites and portals?
A site is a place where your people work, such as an office, a warehouse or a project. Each site can have its own induction portal: a web page where people sign up and do that site’s online inductions. Add a site for each place. Each one then gets its own inductions, sign-in kiosk, incident reporting and admin users.
Rules to know
- Sites per plan: Lite 1, Team 1, Team Plus 3, Team Pro 5, Enterprise 9. The free trial has 9.
- Only active sites count. Archive a site you no longer use to free up a space.
- More sites: on Team and above, you can buy extra sites for $90 a month each.
- Who: only the Account owner and Administration Users can add and archive sites.
- Restoring: you can only restore an archived site if your plan has a free space.
- Moving to a smaller plan: sites over the new limit can be archived, with their inductions.
- Portal Hub: needs a plan with more than one site, such as Team Plus and above, or extra sites.
- Portal Hub privacy: a portal you list on the Portal Hub shows its site name and address to anyone.
What you’ll need
- An Account owner or Administration User login.
- A free site on your plan.
- The site’s name and address.
Add a site
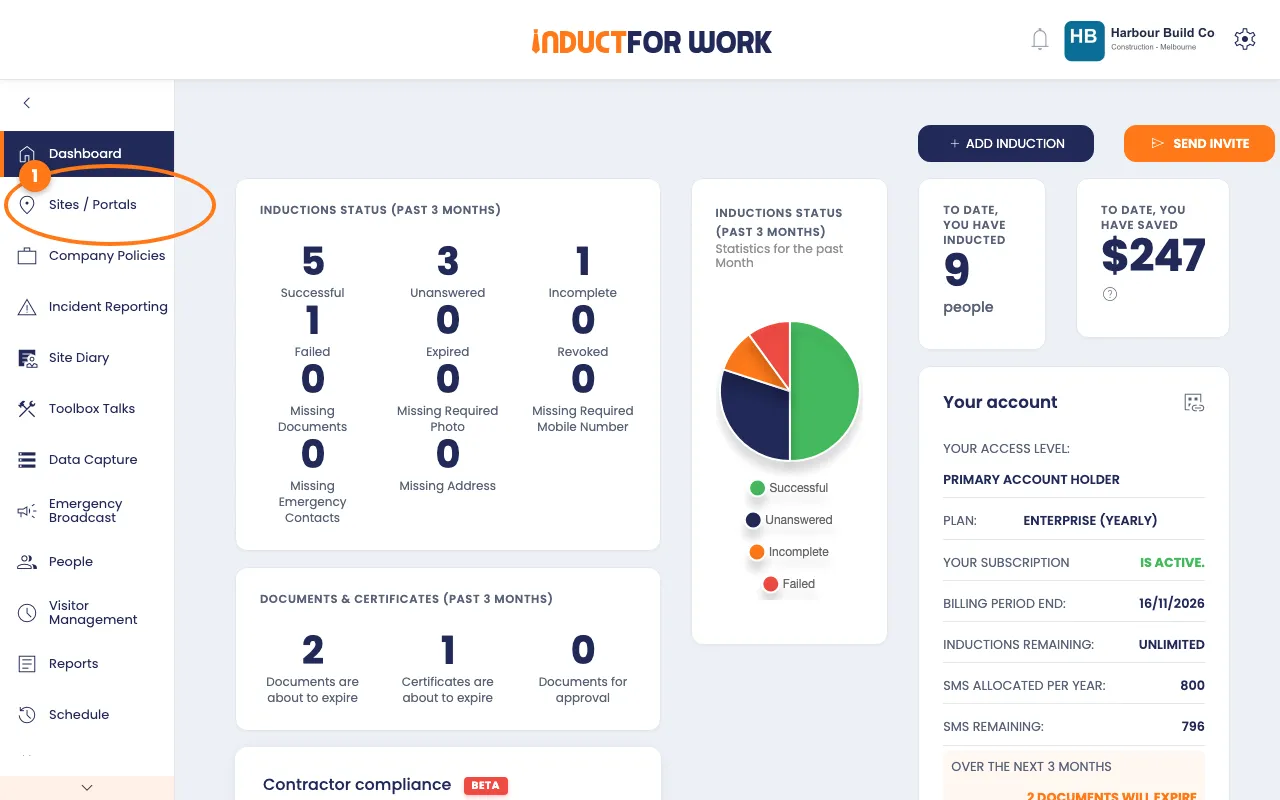
- In the left menu, click Sites / Portals.
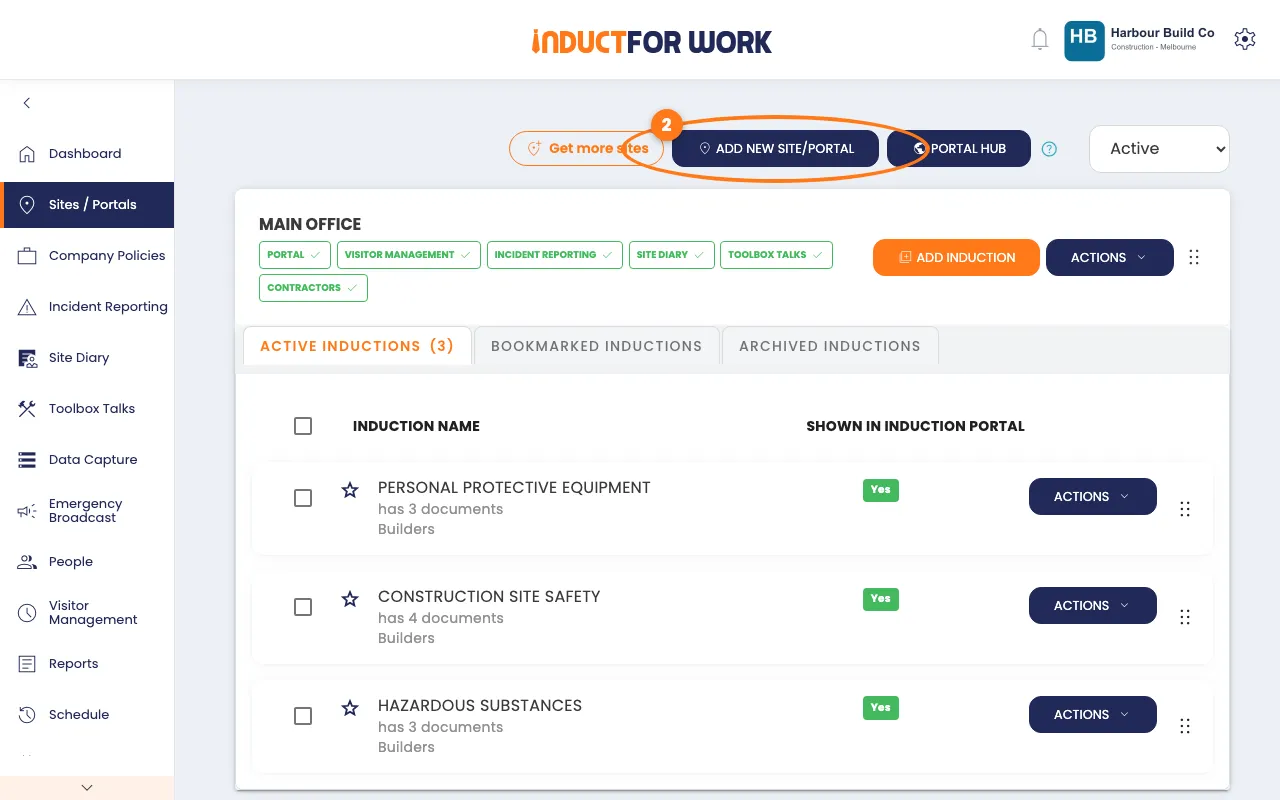
- Click the navy Add New Site/Portal button, top right.
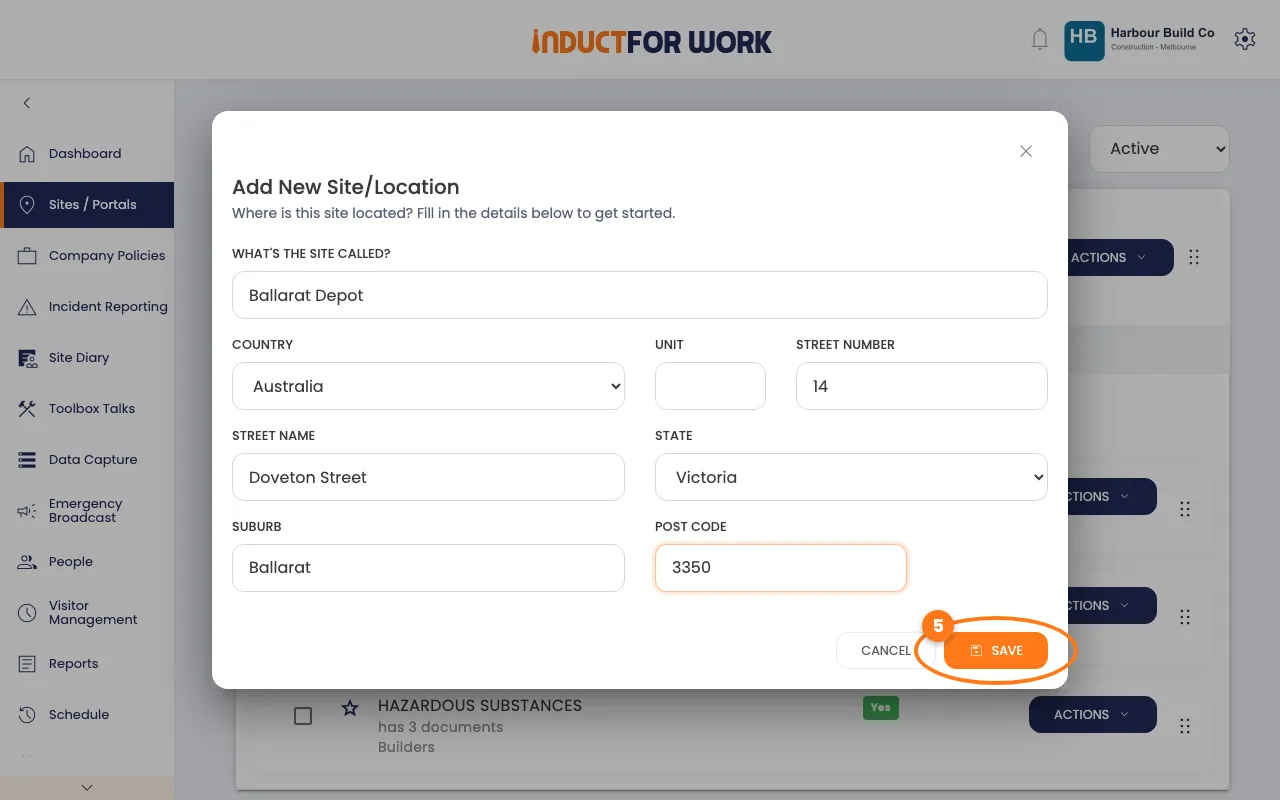
- Type the site’s name under What’s the site called?.
- Pick the Country, then fill in the address.
- Click the orange Save button.
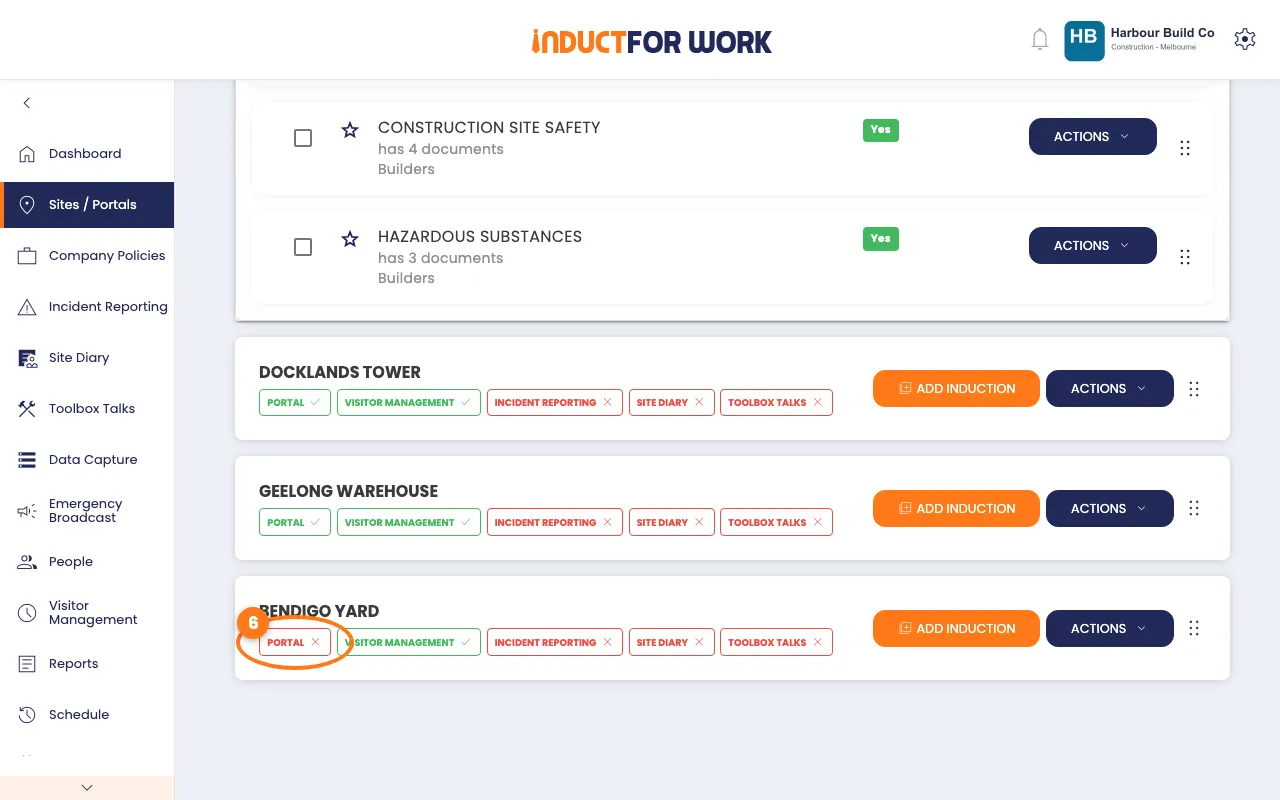
The new site shows in the list. Its Portal badge is red until you switch the portal on.
Need more sites?
Click Get more sites, top right. It shows what the next plan adds, or lets you buy extra sites.
Switch on its portal
- Click the red Portal badge under the site’s name.
- Click the orange Enable Portal button.
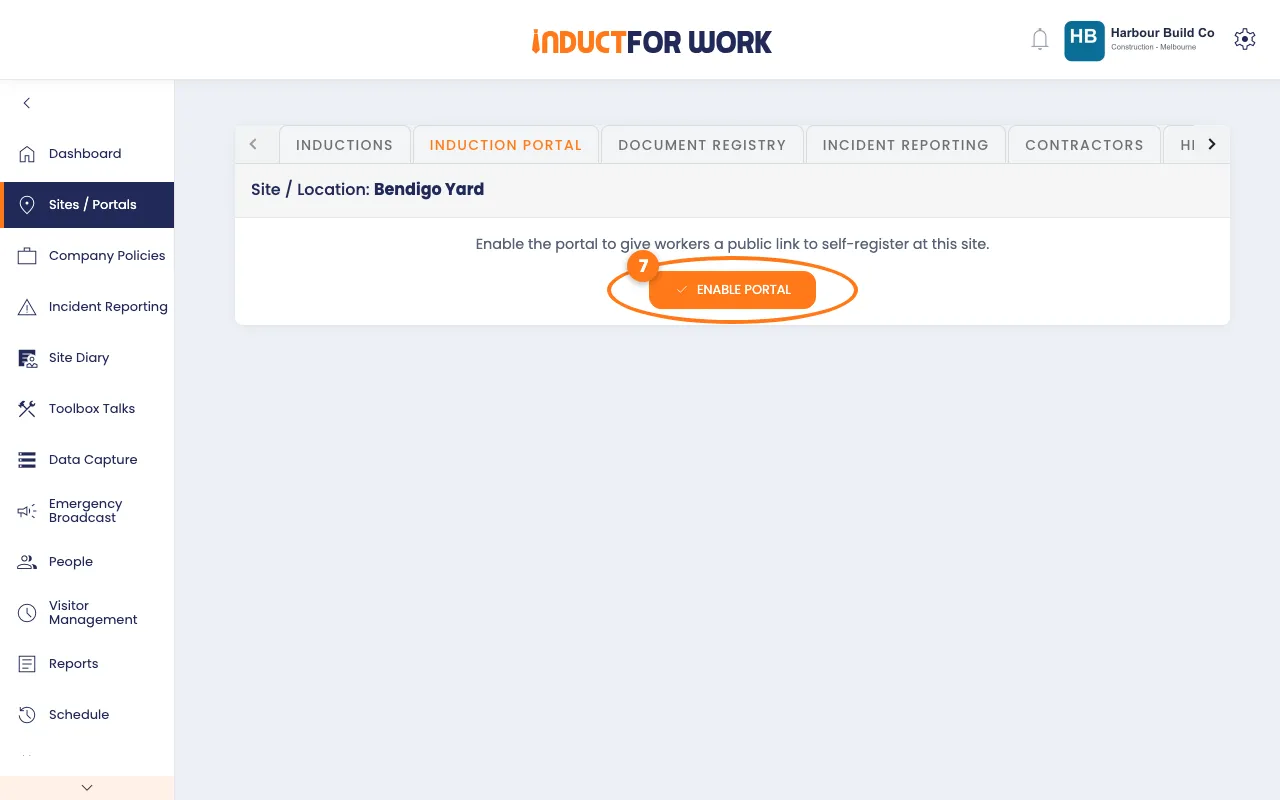
The portal gets its own link. To add an auth key, colours and instructions, see Induction Portals.
List your portals on one page
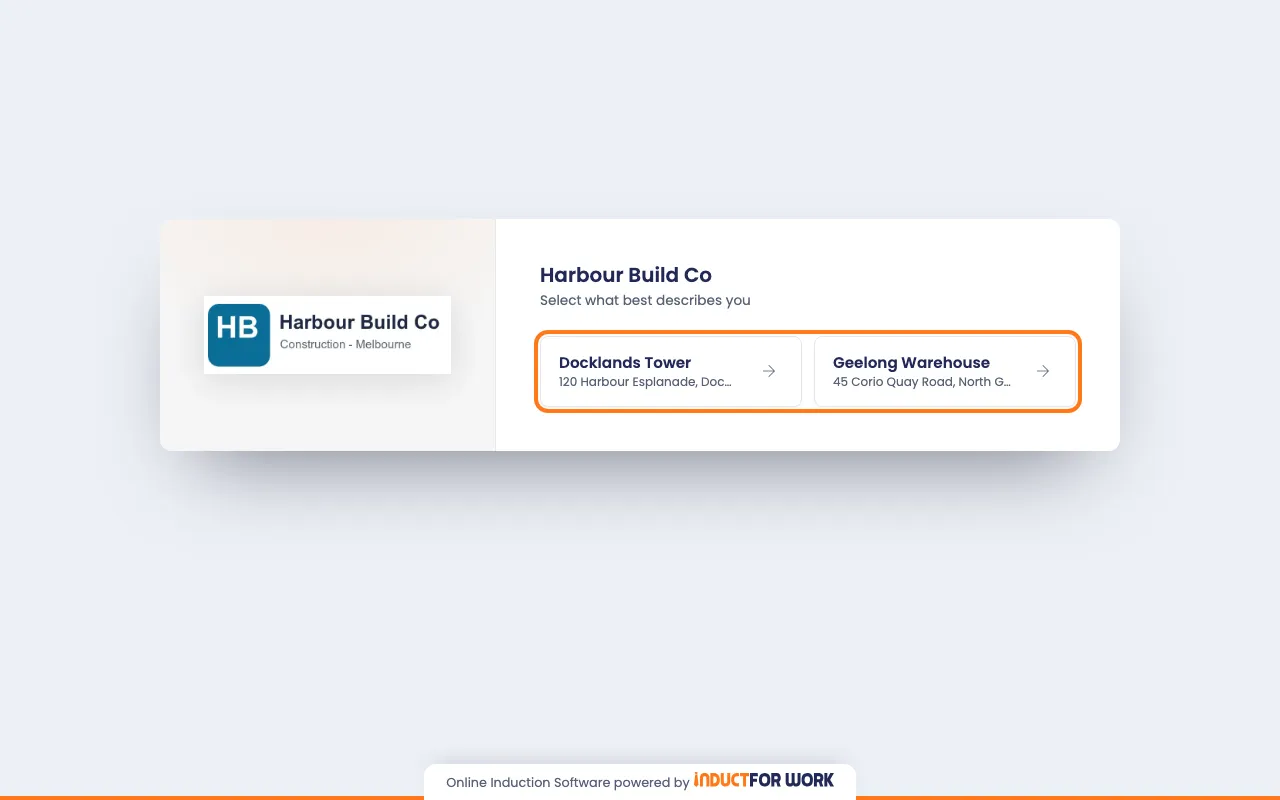
The Portal Hub is one public page that lists the portals you pick. People open it and choose their site.
- On Sites / Portals, click the navy Portal Hub button, top right.
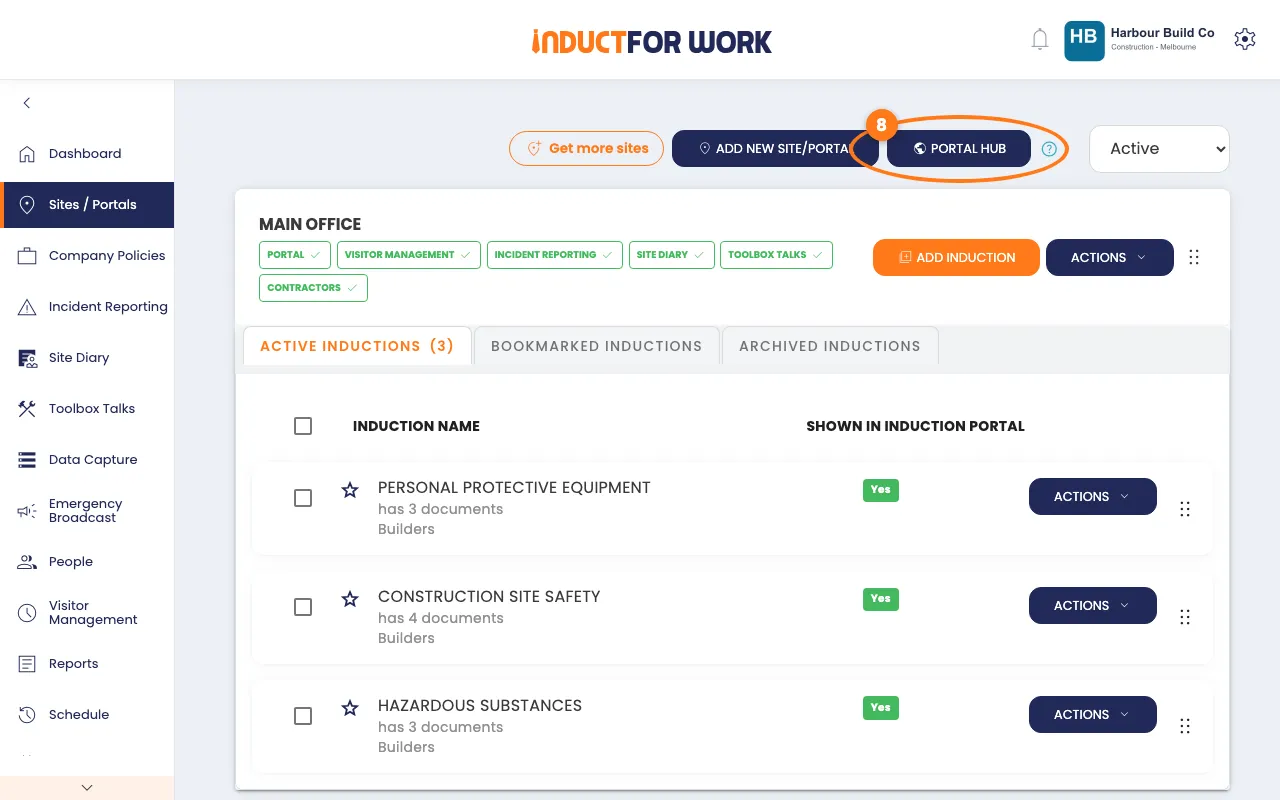
- Switch on each portal you want to list.
- The first time only, click the orange Enable Portal Hub button.
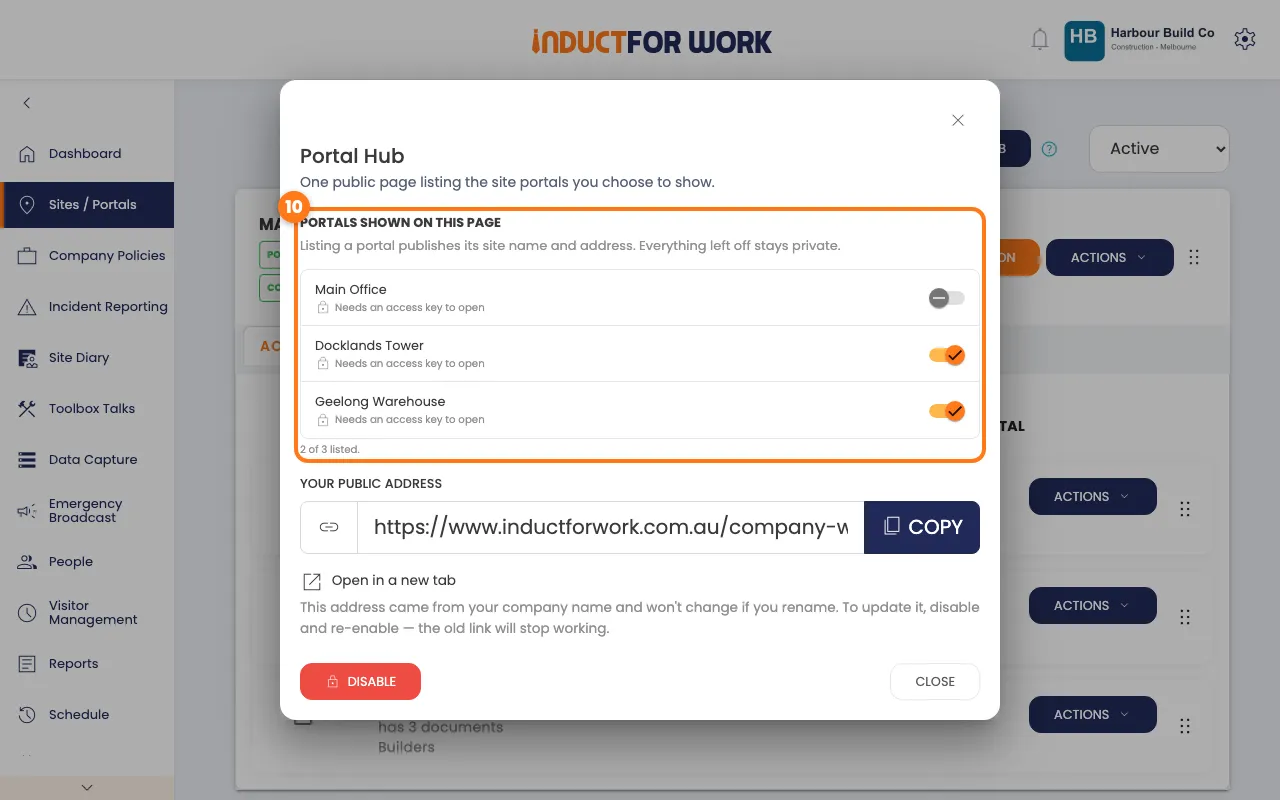
- Click Copy next to Your public address and share it.
Archive or restore a site
- Click the navy Actions button next to the site, then click Archive.
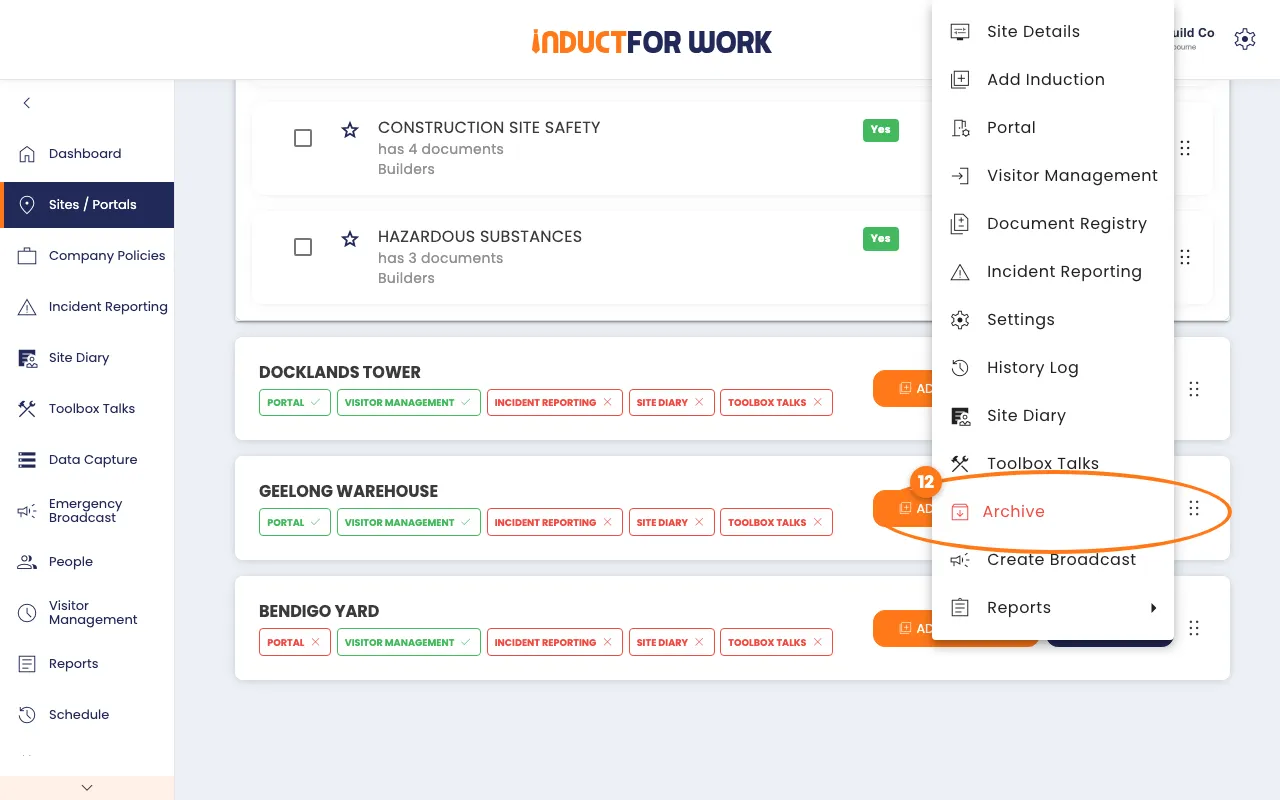
- Click Archive to confirm.
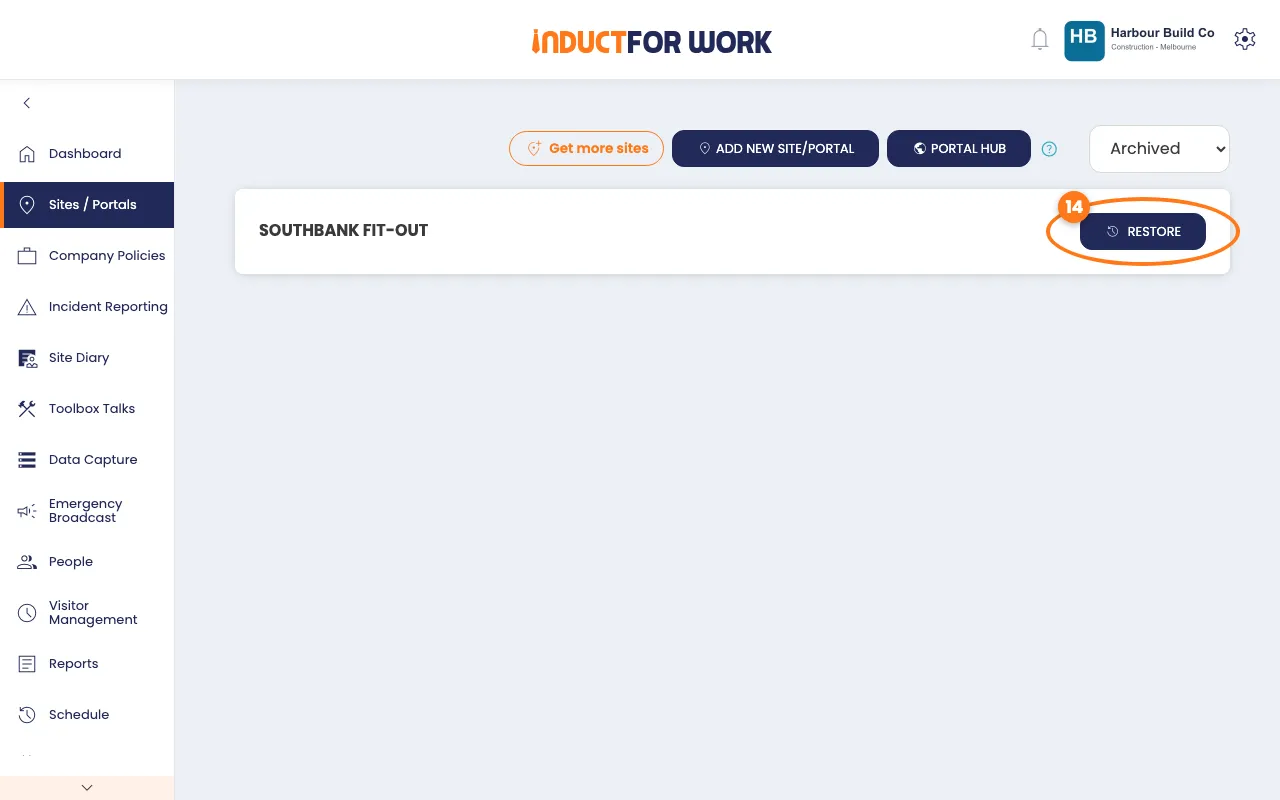
- To bring it back, pick Archived in the list, top right, then click Restore.
What other people see
Each portal has its own link. On the Portal Hub, people see the sites you listed and tap theirs to open its portal.
Working with contractor businesses?
Don’t make a portal for each contractor. Use Contractor Management instead. Contractors then manage their own workers and documents.
Done! What happens next
- Your new site appears under Sites / Portals, ready for its own inductions.
- Once its portal is on, it can also use Visitor Management and Incident Reporting.
- Archived sites keep their records and can be restored later.